Hey, baking buddies and sugar fiends! Buckle up, because today we’re ditching the overpriced siren song of drive-thru danishes and diving headfirst into the land of homemade Starbucks Cheese Danish. You read that right. No more questionable stares from the barista as you order your third danish of the week.
Why this cheesy, flaky Everest, you ask? Well, 2024 is my year of baking domination. And what better way to kickstart this flour-dusted journey than with a buttery, cream cheese-filled masterpiece that rivals the green and white giant?
Besides, let’s be honest, those Starbucks danishes are tempting, but pricey. Like, “second mortgage for breakfast” pricey. Plus, you never know how long they’ve been chilling in that display case, judging your questionable life choices. No, friends, we deserve fresh, warm, homemade goodness, straight from our ovens (and straight into our faces).
Now, I know what you’re thinking: “But Draden, I’m a culinary klutz! My attempts at baking usually involve smoke detectors and disappointed sighs.” Fear not, my friends! This recipe is like a fluffy hug for baking newbies. We’re talking only a few ingredients, minimal effort, and maximum deliciousness. Even if you struggle to boil water, you can probably handle this. (No offense to boil-water strugglers, I’m one step ahead of you on that front.)
So, gather your courage, preheat your oven, and let’s channel our inner pastry warriors!
The Cast of Characters:
1 sheet of frozen puff pastry: Our flaky hero, thawed and ready to be transformed.
8 ounces of cream cheese: The creamy, dreamy star of the show. Make sure it’s nice and soft, like a pillow you want to snuggle.
1/2 cup of sugar: The sweetness that’ll make your taste buds sing .
1 teaspoon of vanilla extract: Because everything is better with vanilla, maybe just measure this with your heart.
1/4 teaspoon salt: I’m a little salty about some things.
1 egg, beaten with 1 tablespoon of water: Our golden glaze, ready to give these danishes a beautiful tan.
Bonus Round: Level Up Your Danish Game
Feeling like a pastry pro? Take your danishes to the next level with these toppings:
- A drizzle of icing: Vanilla, chocolate, even maple, the possibilities are endless!
- Fresh fruit: Berries, sliced apples, or even a dollop of jam for a fruity twist.
- Nuts and seeds: Chopped almonds, walnuts, or pumpkin seeds for a bit of crunch.
Remember, friends, baking isn’t about perfection, it’s about the journey. It’s about the flour-dusted laughter, the burnt-finger battle scars, and the sweet satisfaction of creating something delicious with your own two hands. So grab your rolling pin, embrace the mess, and let’s conquer the world, one flaky pastry at a time!
P.S. If you have any tips for a novice baker like myself, please share them in the comments!

Starbucks Cheese Danish
Course: Dessert, BrunchCuisine: AustrianDifficulty: Easy9
servings30
minutes17
minutes47
minutesIngredients
1 package frozen puff pastry (2 sheets)
8 ounces regular cream cheese, softened
1 egg yolk
½ cup granulated sugar
1 teaspoon vanilla extract
¼ teaspoon salt
1 whole egg
Directions
- Preheat your oven to 400°F (200°C). Basically, get your oven fired up like a dragon guarding a hoard of pastries.
- Unroll your puff pastry sheet and gently roll it out. Think of it as giving your dough a spa day, not pummeling it into submission.
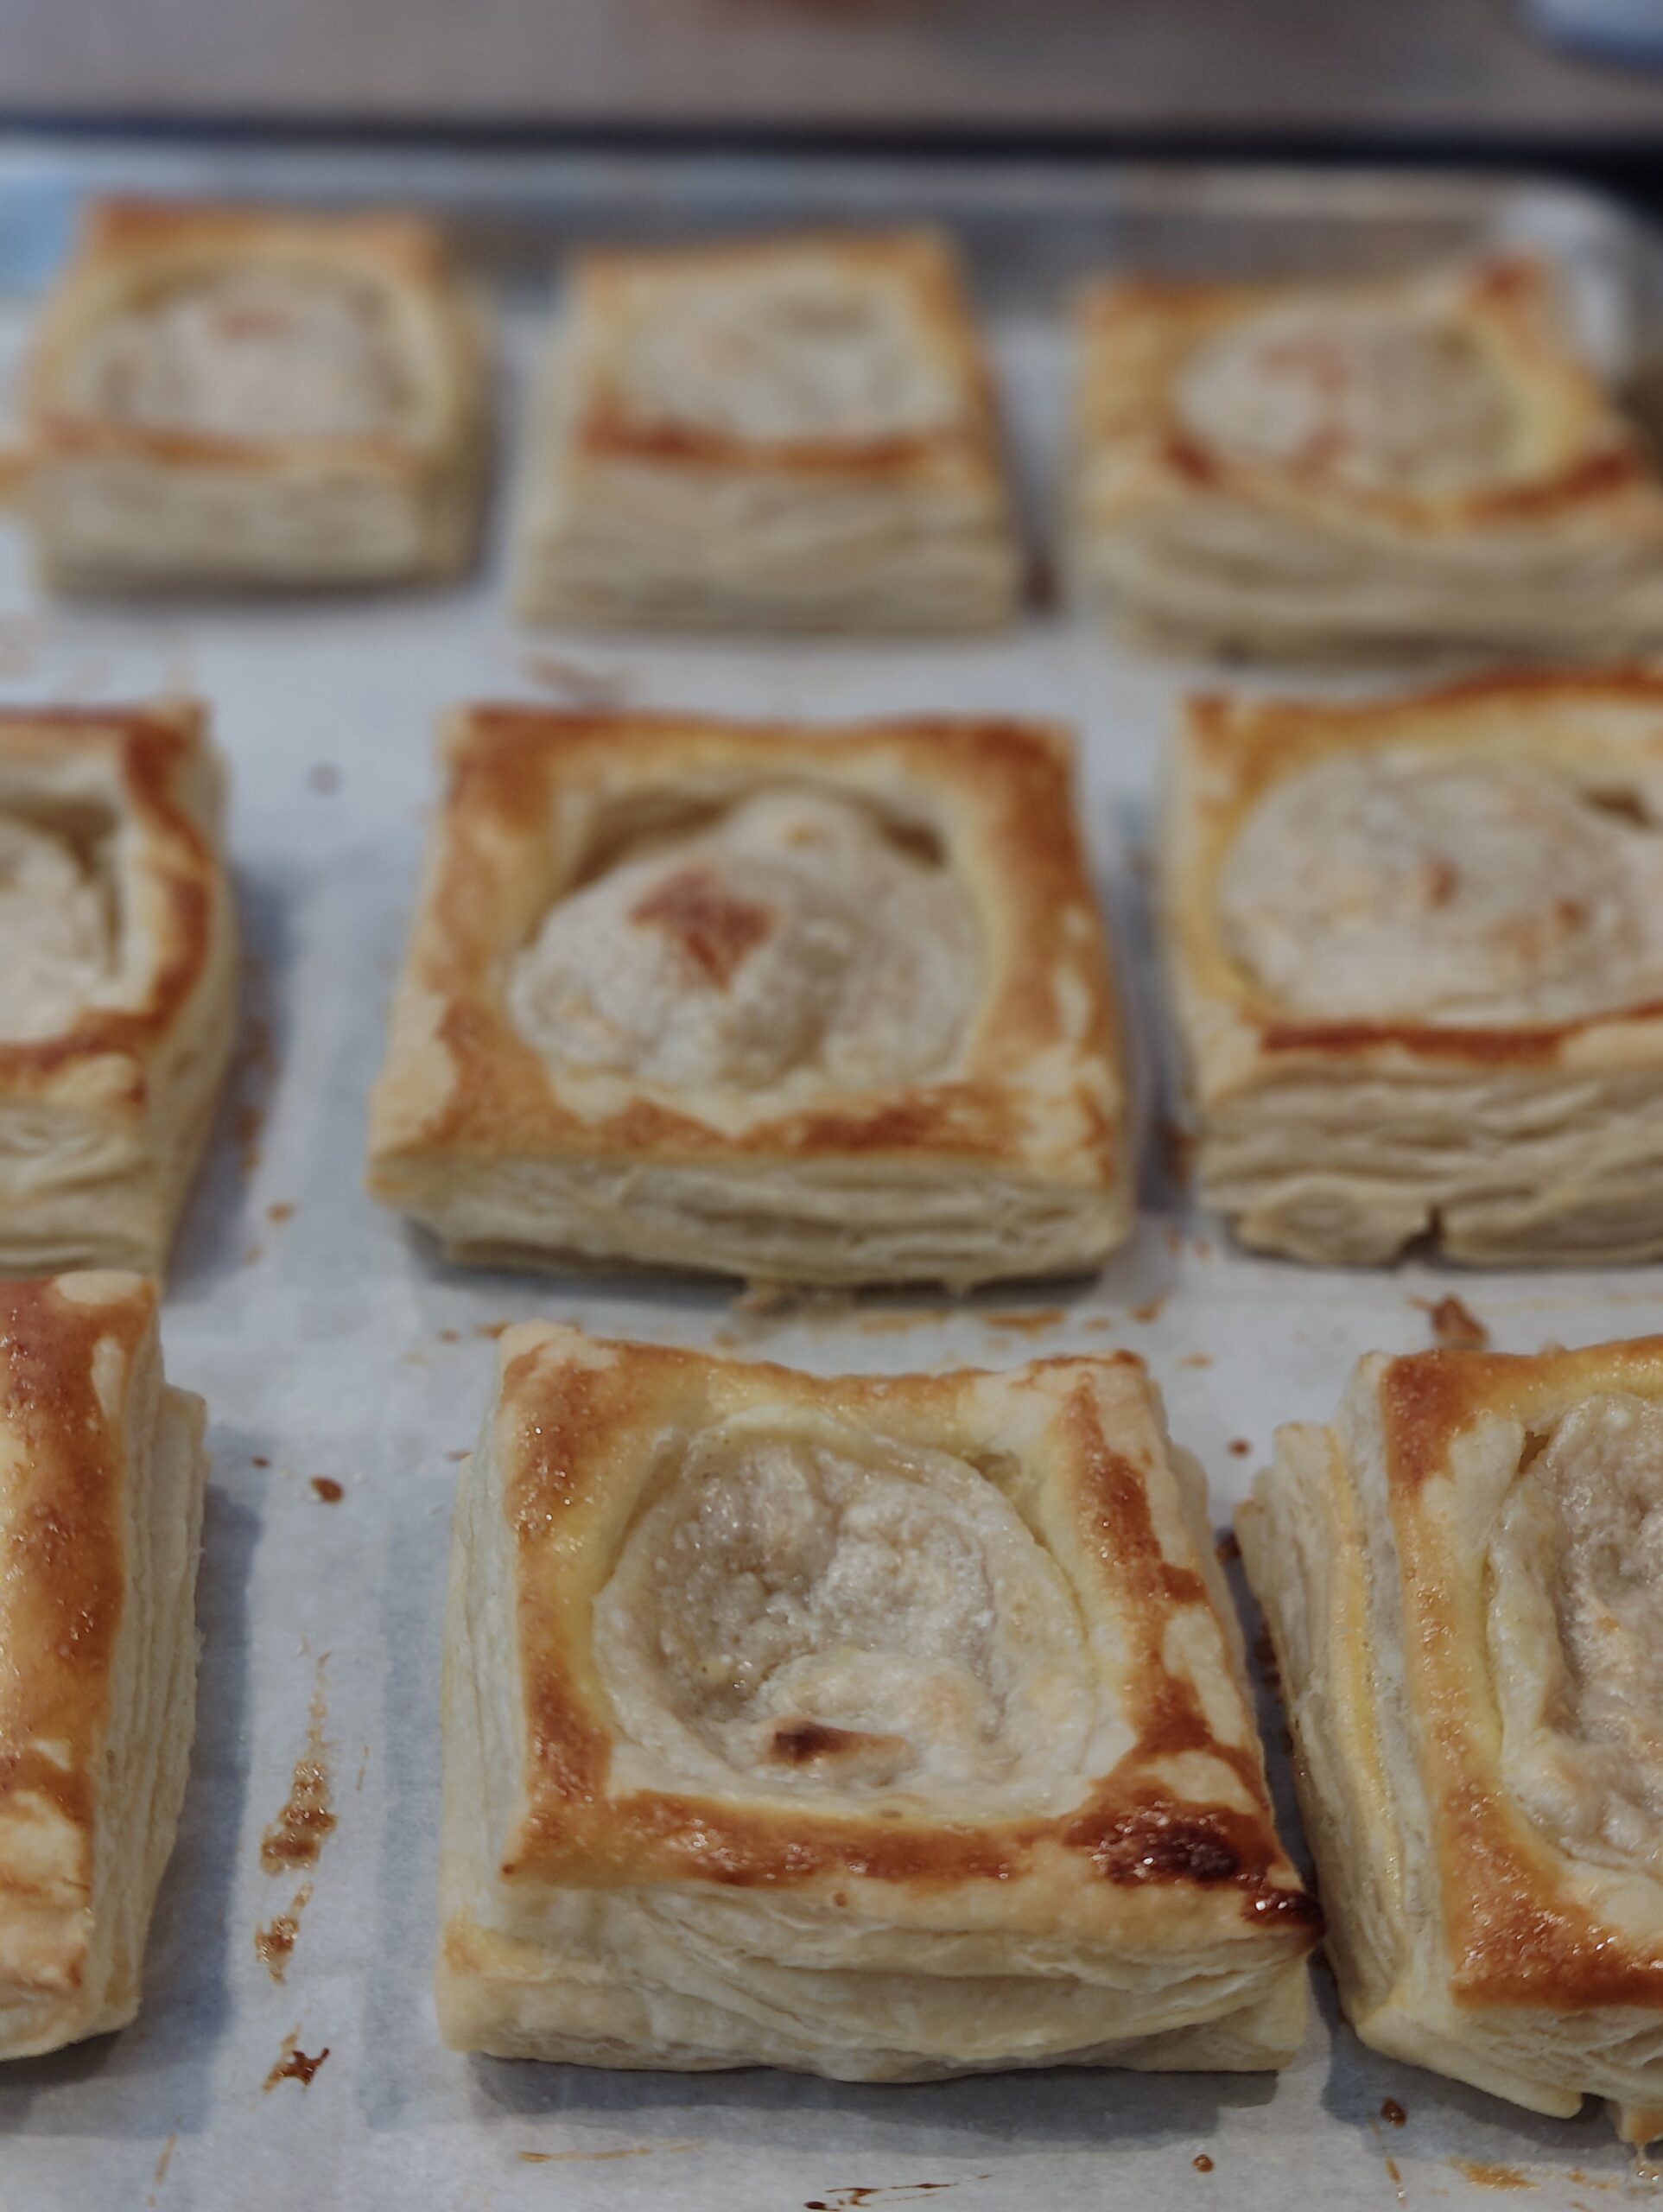
- Cut the pastry into 9 similar sized rectangles. Aim for squares or rectangles, whatever your artistic heart desires. Don’t worry if they’re not perfect, nobody’s judging your pastry Picasso skills (except maybe yourself, but shh).
- Then, cut the other sheet into 9 similarly sized rectangles, and cut out a rectangular hole in the center of each one. This little window is where the filling will show through, and should be roughly 1-½ inches by 3 inches.
- Whip up your cream cheese filling. In a bowl, mix the softened cream cheese, sugar, and vanilla extract until smooth and creamy. Think of it as a luxurious face mask for your pastries, except edible.
- Spoon the filling onto the center of each of the first pastry rectangles. Don’t be shy, embrace the cheese! You can even get fancy and pipe it on if you’re feeling adventurous.
- Brush the edges of the pastry with the egg wash.
- Now top them with the each with one of the other rectangles cut out.
- Brush the new edges of the pastry with the egg wash. This is like giving your danishes a golden tan, the kind that comes with bragging rights, not sunburn.
- Pop those beauties in the oven for 15-17 minutes. Now is the perfect time to put on your favorite dance music and pretend you’re in a baking competition show, complete with dramatic music and sassy commentary. (Optional, but highly encouraged.)
- Take your danishes out of the oven when they’re golden brown and puffy. Let them cool for a bit, then dig in! You deserve it, champion baker.


Leave a Reply